

Purchase event
Background
Google events let you measure the interaction of specific actions, or repeated actions, that a user performs on your website. In particular, the purchase event is the one that reflects conversion metrics along with the monetary value of each recorded transaction.
Previously, when this event was set up in Universal Analytics or Google Analytics 4, it recorded the corresponding data, but there were some inconsistencies in its values and recording sources.
To get more accurate metrics, this event must be set up in Google Tag Manager with the Google Analytics 4 property.
If your website’s conversion values are not currently being recorded, you’ll need to check that this event is set up correctly, or create it if it isn’t active.
Steps to set up the event
-

In Google Tag Manager > in the side panel, under Triggers, check whether the purchase trigger exists. If you have other conversion events active, it probably already exists, and you should continue to step 2.
If the trigger doesn’t exist, start the setup process > choose the Custom event trigger type. As the trigger name, write
**purchase**(all lowercase), select the checkbox*Use regex matching*, and as the firing option*All custom events*.Then you can name the trigger and save it.
-
In Google Tag Manager > in the side panel, under Tags, start the process to create a new one.
In the tag configuration, select Google Analytics>
*Google Analytics: GA4 event*> Here you need to use the GA4 measurement ID. To get this value, go to the Google Analytics panel and, from Admin, open the Data streams section to copy the measurement ID.
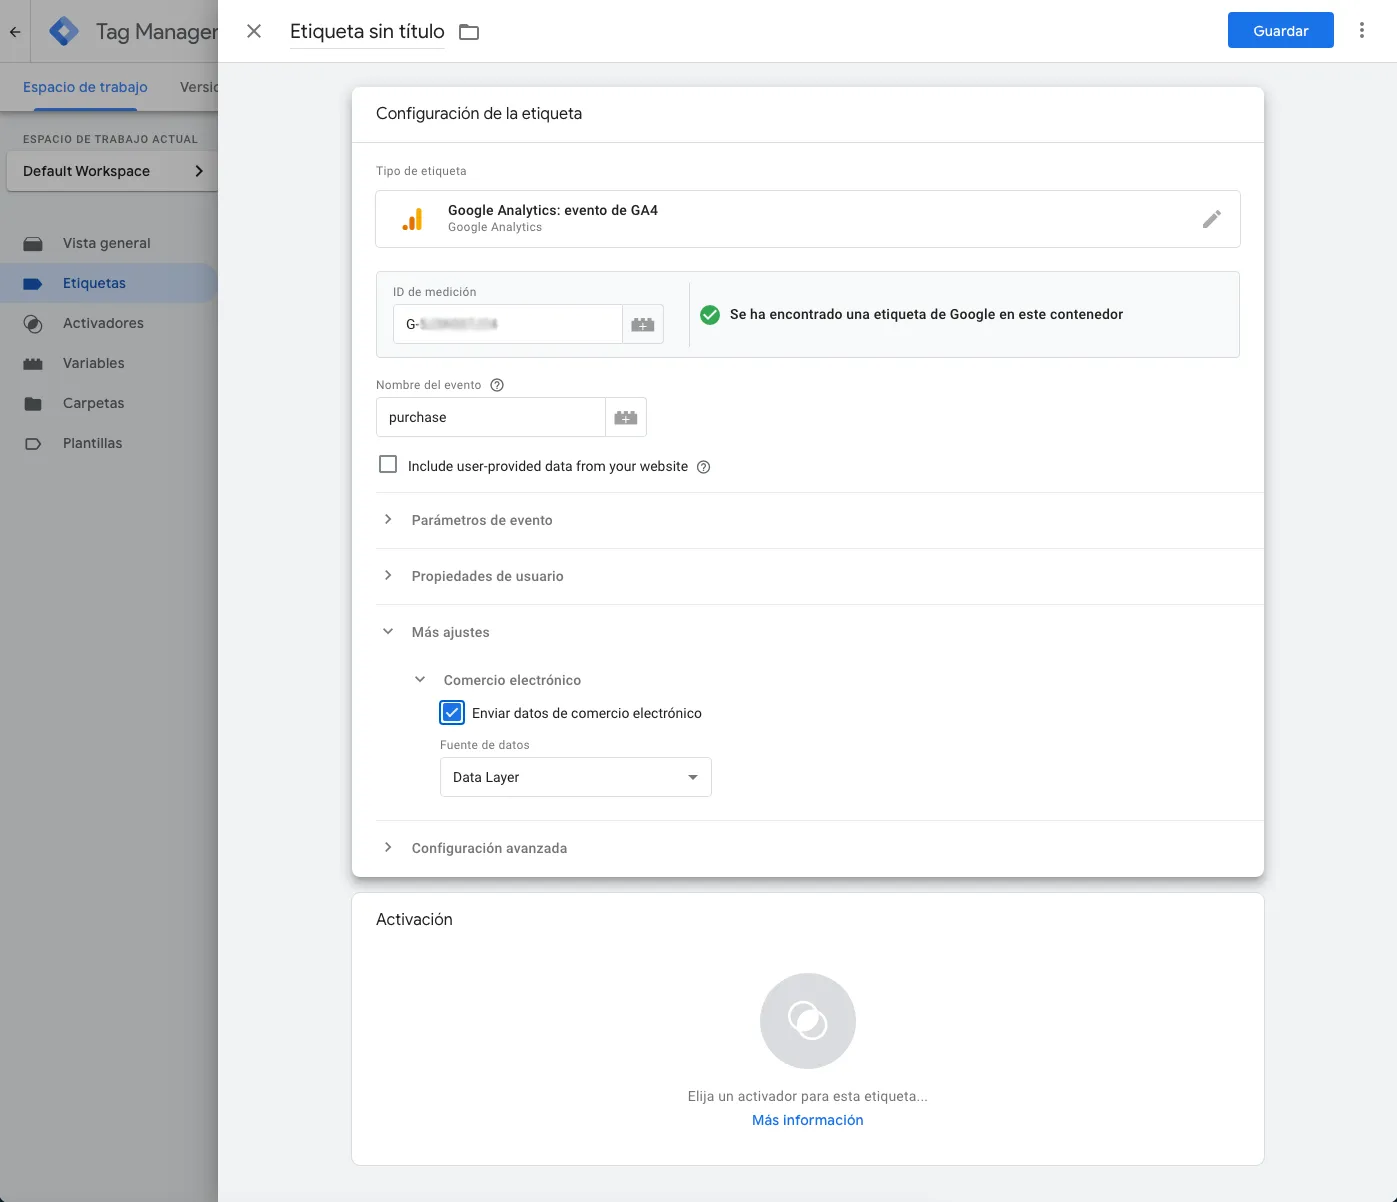
Once the connection is validated, in the Event name field write **purchase** (all lowercase).
In the More settings > E-commerce section, select the checkbox Send e-commerce data, choosing Data Layer as the data source.
-
To fire the tag, select the trigger you created earlier, the purchase custom event trigger.
-
Now that the tag and its trigger are set up, save and proceed to publish the changes. If you don’t do this step the tag won’t start working.
To check that it works, you can use the preview (debug mode) by placing an order that gets approved in your store.
Once the tag is active, it can take up to 24 hours to record conversion activity.