

Image galleries
Galleries in Bolder let you upload, sort and display images. Besides a title and description, each item in a gallery can have a URL attached. It can point wherever you want, inside or outside your site, so you can manage on your own where your customers end up. When you open this section you will find the list of galleries you have created.
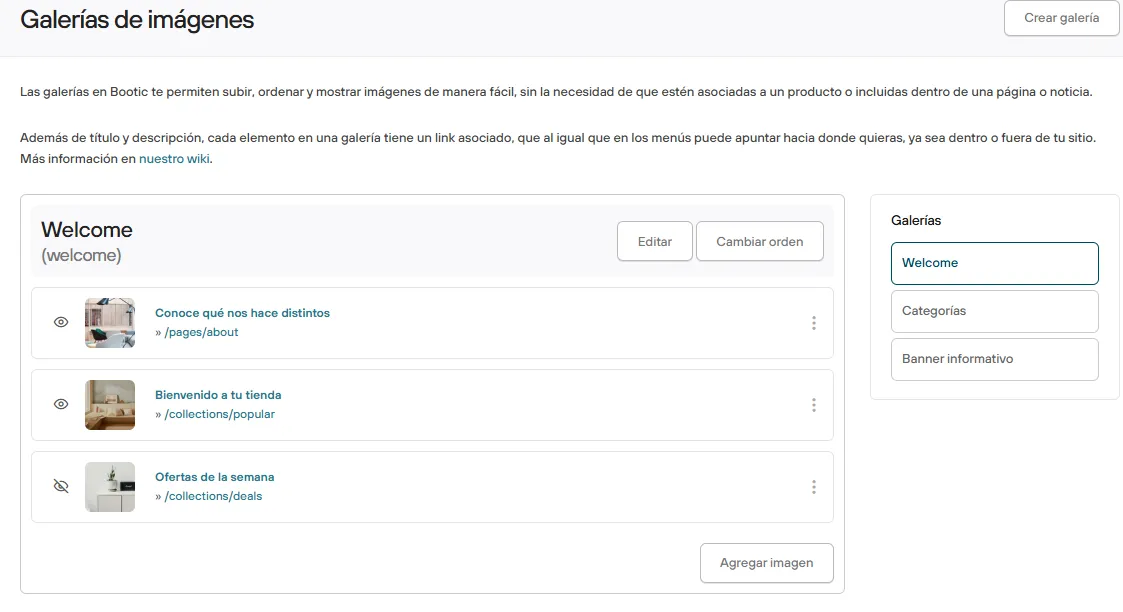
Depending on how you use each gallery, there are different fields where you can enter information, as well as buttons to run specific actions:
- Change order: drag the boxes to change the order of the images in the gallery.
- Edit: lets you change the name of the gallery, or delete it if needed.
- Visible / Not visible: click the icon next to the image to set whether it shows in your store.
- Change title and description: here you can give each image a title and description (especially useful for main galleries or category galleries)
- Change link: lets you change the URL the image points to (or leave it without any link)
- Delete image
- Add image (you can also add images by dragging them into the gallery you want)
Click the New gallery button to create a new one and give it a title. Once created, the new gallery will appear at the bottom of the list.
One important thing to keep in mind: the maximum size allowed for uploaded images is 2MB. We recommend using images exported for web at 72 dpi.
Steps to create and display an image gallery
Galleries are a tool that lets you visually highlight content in your store. In a gallery you can upload one or several photos, and each one can take your store’s visitors to:
- a collection,
- a form
- a product type
- a manufacturer
- a post
- an external link
- Create a new gallery
- Change the order of the items. Edit the title
- List of items
- Edit or delete an item
- Add a new item
Step 1: Create the gallery
In your Bolder admin panel go to Content > Galleries > New gallery, give it a name (for example, Home) > click Create gallery
Step 2: Add photos
Once the gallery is created, it’s time to add content. Click Add item and then:
- Drag a photo from your computer (or click to choose one).
- Set the link for the photo. When a visitor clicks the photo, they will go to the place you define here.
- Click Add.
Repeat the steps above to add more photos to your gallery.
Step 3: Display the gallery
To make your new gallery visible, open the Design Editor and set up how your gallery looks there, depending on the section you added (main gallery, banner group, etc.)
Additionally, if you have the know-how, you can set up your image galleries in HTML and CSS by following Example 2 of the Recipe “Product gallery or slideshow”.