

Requirements for bulk messaging
Google and Yahoo announced measures to strengthen their users’ privacy and data protection against bulk messaging.
Guidelines for senders
Among the main rules being implemented:
Subscriptions and unsubscriptions
Remember that every bulk send should ideally go only to the customers who agreed to receive promotions. For your Bolder site, you can check this information in the panel and in the exportable spreadsheet (see more details here)
If you use a customer list that did not agree to be part of a promotional list, those messages could be marked as SPAM, which will hurt your delivery rate.
In addition, the process for unsubscribing must be easy for the user. Every campaign must include a one-click option, and you should regularly check that users are removed from your working list.
Spam messaging
Starting in February 2024, it will be mandatory for senders to keep spam complaints below 0.1% in an ideal scenario, making sure they never reach or exceed 0.30% (otherwise all messaging could be sent straight to SPAM).
To reduce the chances of Gmail blocking messages from your domain or marking them as spam, follow the general recommendations available in the help center.
Email authentication
To prevent impersonation and avoid malicious attacks (phishing, spoofing, among others), you must set up email authentication for each of your sending domains with your DNS provider.
To improve email delivery, we recommend setting up SPF, DKIM and DMARC records on your domains.
You can find out how in the help center of your email marketing platform.
Domain authentication in Active Campaign
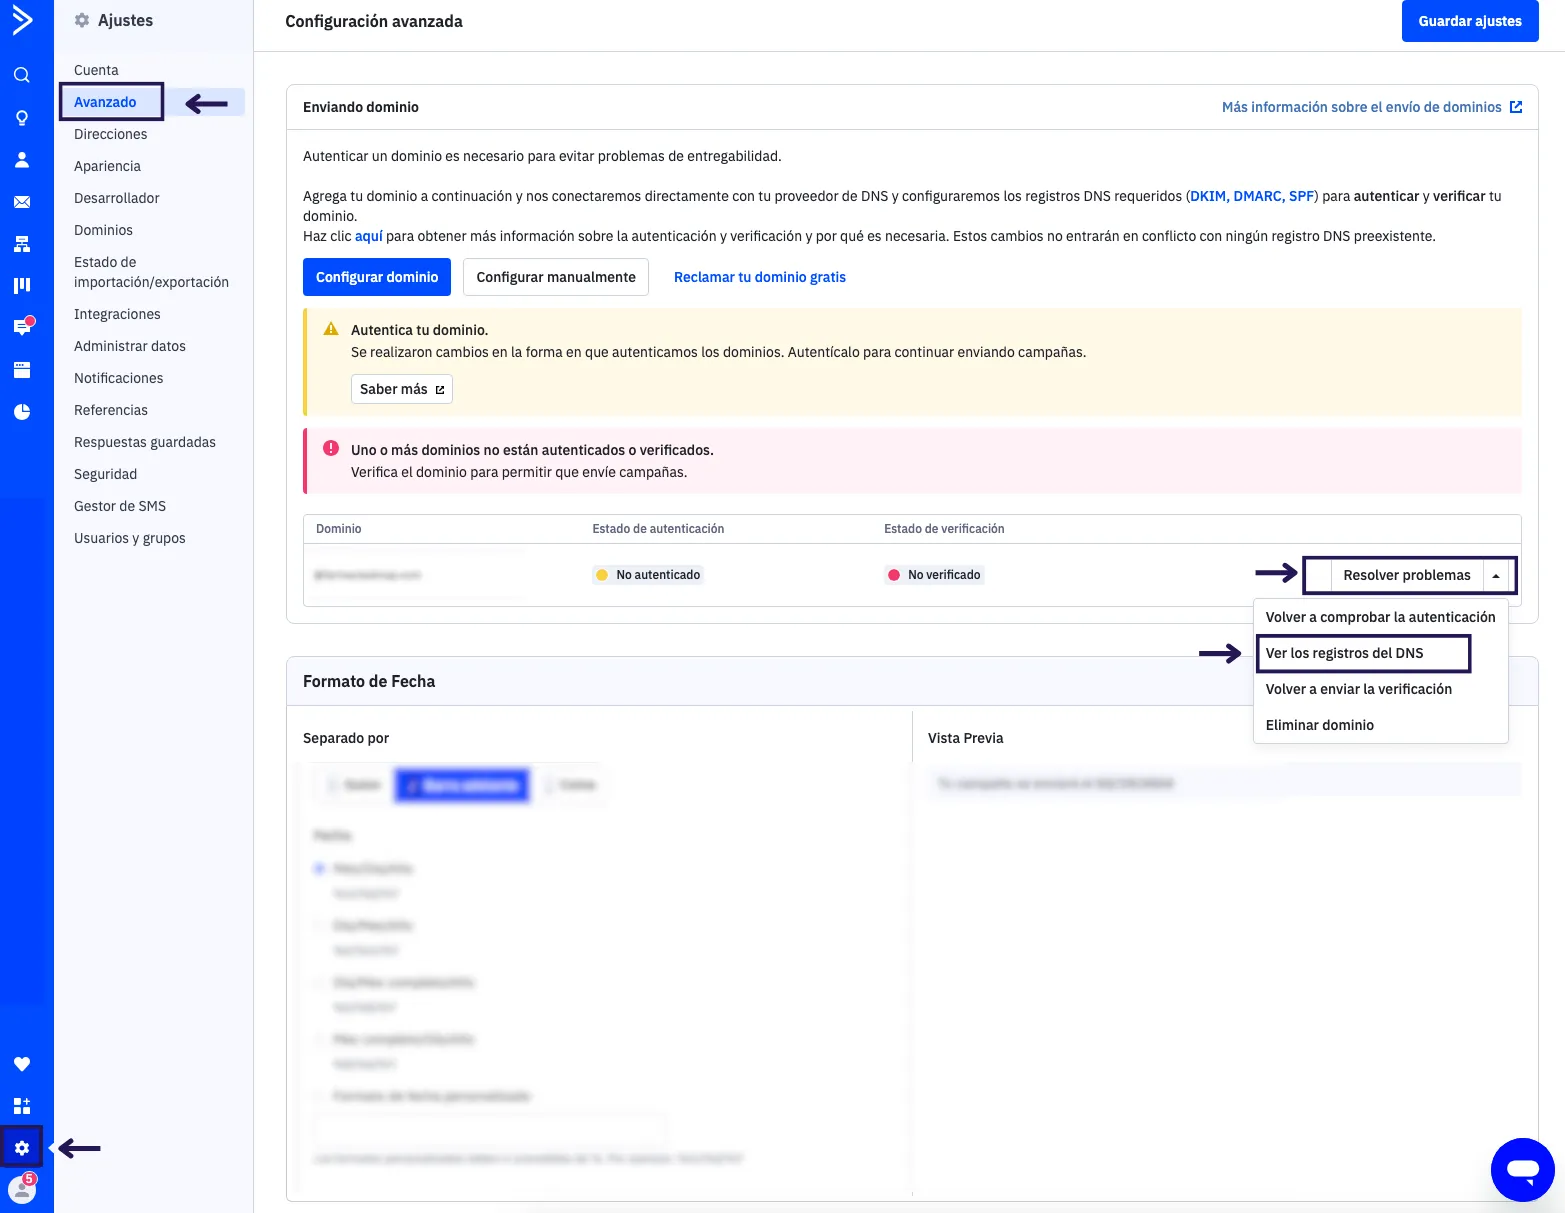
Once you log in to your Active Campaign account, go to Settings > Advanced in the lower left corner. There the platform will show you the authentication and verification status of your domain.
If you manage your own DNS provider, click “set up domain” and the platform will guide you through the process in a simple way. Here you can see the step-by-step guide.
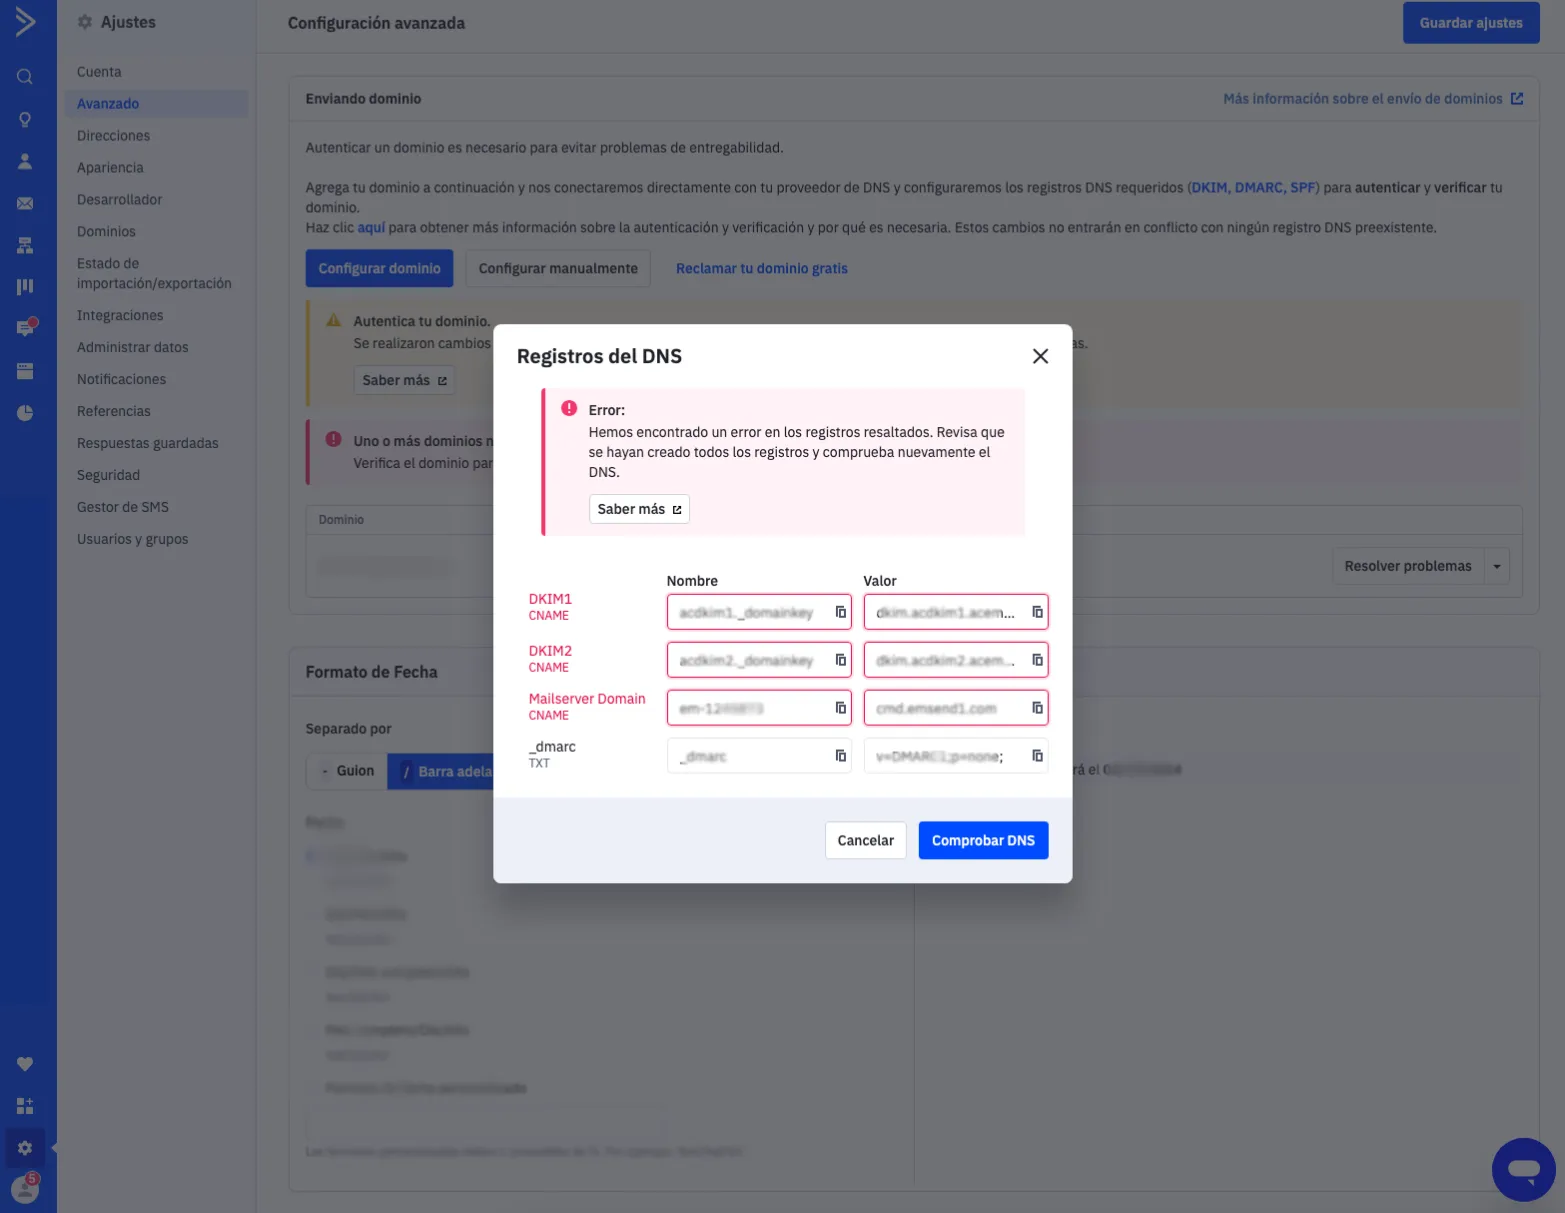
If you manage your DNS in Bolder, open the dropdown of the “Troubleshoot” button and select the “View DNS records” option.
A window will open with all the records. Copy each one and send it to our support team or to the channel assigned to help you with the setup.
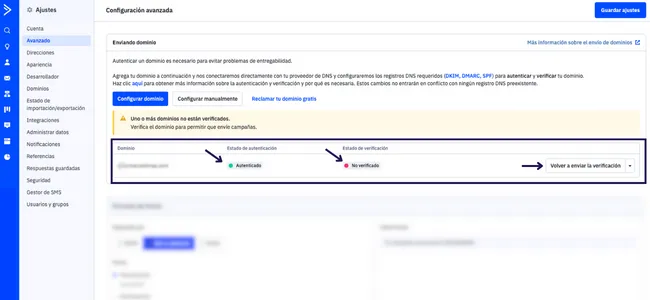
Once the domain is authenticated, its status in the platform will change from “Not authenticated” to “Authenticated”. This process can take up to 48 hours.
Once the DNS records are validated, you need to move on to the verification process, in which the platform sends an email to the designated address. If you don’t receive the email automatically, you can resend the verification to the corresponding inbox.
Links of interest
New Gmail protections for a safer, less spammy inbox by Google
More Secure, Less Spam: Enforcing Email Standards for a Better Experience by Yahoo