Bulk actions on orders
There are several operations you can perform on placed orders. If you need to apply a change to many of them, you can do it from the panel or through a bulk upload.
Changes from the orders table

In the admin, in the orders section, you can see the full table of placed orders and apply any filters you need.
To make changes, select the orders. Once they are checked, choose the operation you want to perform at the bottom of your screen. Here you will find:
-
View printable version: To print all the selected order tickets
-
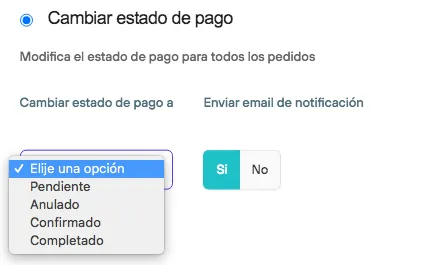
Change payment status: changes all the selected orders to Pending payment - Canceled - Confirmed - Completed. The available options depend on the status the selected orders are in. Once you choose the operation, you can opt to send a notification to each customer.
-
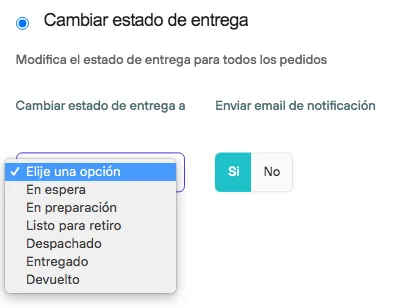
Change delivery status: changes all the selected orders to Preparing - Ready for pickup/shipping - Shipped - Delivered - Returned. The available options depend on the status the selected orders are in. Once you choose the operation, you can opt to send a notification to each customer.
-
Assign tags: Here you can add all the tags you need to the selected orders. You can choose from the existing ones or create new ones.
-
Archive: New feature - Not available yet
-
Remove archived: New feature - Not available yet
-
Send follow-up email (pending orders only): This operation only applies to orders with a pending payment status. You can resend the notification manually, strategically, so that users complete their purchase.
Remember that the first pending payment notification is sent automatically 5 minutes after the order is placed and has no associated payment activity. Depending on your store’s settings, a second automatic notification could be sent after 24 hours.
-
Send follow-up email (incomplete orders only): This operation only applies to incomplete orders, so you must apply that filter to use it. This notification aims to recover abandoned carts by sending it manually. You can also set up your store to send this notification automatically 24 hours after the order is abandoned.
Changes via bulk upload

Depending on what you want to achieve, you will need to prepare the corresponding spreadsheets to import into Bolder. When you drag the CSV file in, the list of available operations is displayed.
Change payment status
To change the payment status of multiple orders, prepare a spreadsheet that includes only the column **id** or **code** . Once the file is ready, drag it into the orders view.
Choose the option Change payment status > and then select the status all the orders should be changed to.
- Under review
in_review - Pending payment
pending - Canceled
cancelled - Confirmed
closed - Completed
completed
If you need to make different status changes, prepare one spreadsheet for each of them, for example one spreadsheet to cancel and another to confirm.
When making this status change, you can choose whether or not to send an informational notification to users.
Change delivery status
As in the previous section, to make a delivery status change on multiple orders, prepare a spreadsheet that includes only the column **id** or **code** . Once the file is ready, drag it into the orders view.
Choose the option Change delivery status > and then select the status all the orders should be changed to.
- Queued
queued - Preparing
preparing - Ready for pickup
ready - Shipped
shipped - Delivered
delivered - Returned
returned
If you need to make different status changes, prepare one spreadsheet for each of them, for example one spreadsheet to mark the orders as shipped and another for delivered ones.
When making this status change, you can choose whether or not to send an informational notification to users.
Assign tags
Order tags are an excellent way to keep your orders organized internally.
For this operation you can use existing tags or create them when you upload.
For the bulk upload spreadsheet, use only two columns: **id** or **code** to identify the orders, and the column **tags** .
This bulk action only allows applying the same tags to all orders. You can upload multiple tags separated by commas, but they will be applied to the entire list without distinction. If you need to apply different tags, do it in separate spreadsheets.

Add document numbers
You can associate different documents with each order placed in Bolder, to provide more information for managing it. Here you can add details of invoices, receipts or purchase orders, which you and your team can see, and the customer can also see from their console.
To add the information for these documents, create the spreadsheet with three columns: **id** or **code** to identify the orders, **document_type** to indicate the document type, and do**cument_number** to indicate the associated number.
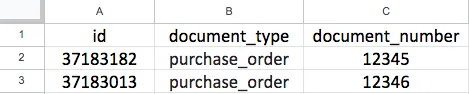
IMPORTANT: For the **document_type** field you must use one of the following values, otherwise the upload will not be processed
- Invoice:
invoice - Receipt:
receipt - Purchase order:
purchase_order